Sadly, we forgot to talk like pirates on Talk Like a Pirate Day (September 19th), but tonight, thanx to my cousin Tim, the Rosses ate like pirates.
You see, a few days ago, Tim shared a recipe for "Pirate Stew" with me and few others. It sounded so, so yummy. Now, the very first ingredient was ground beef, so, clearly, some adaptations would have to be made, but you know this boot-wearing, rough-talking pirate would never let a little detail like that stand between her and delicious piratey goodness :)
I intended to make it on Monday, I think. Then, I thought, "Okay, maybe Tuesday..." Did I mention the two parent meetings this week at my daughter's middle school? Yeah, well. There were those. And there was a dance class, which now takes place right at dinner time (convenient! Not.) Well, we ordered pizza one night, ate leftovers another, threw together a quick stir fry yet another. So, tonight, I was ready to actually cook something. Pirate Stew it is! ...sorta.
See, I didn't have a can of tomato sauce, or a can of potatoes, or a can of pinto beans. And I don't use worcestershire sauce, because the good kind is not vegetarian, and the vegetarian kind is not good. Yeah, I know, that's a matter of opinion. This is my blog, so you get my opinion. If you like worcestershire sauce, you go right ahead and use it. I also thought it would be a good idea to add a few carrots, and I was in a big hurry, so I didn't use a crockpot. Oh, and we like brown rice better than white. I also left out the spicy stuff, and Shane and I just added hot sauce. So.,. first, I will post a link to the original recipe (Thanx, Tim!):
http://www.ehow.com/how_2309291_make-pirate-stew.html?
You know what? Apparently, I don't know how to post a link. I amend my previous statement: I have posted an address that, should you paste it into your browser, ought to take you to the original recipe. Try it. I'll wait here.
*dum dee-dum dee-dum dee-dum dee-dum*
Oh. Are you back? Awesome. Hopefully it worked and you read it. Sounds super yummy, huh?
Now, I will tell you what I did:
In a soup pot, heat 1 TBS olive oil
Add one small onion, diced. Sprinkle with salt and pepper and cook, stirring for a couple of minutes, until onion is translucent.
Add one package veggie burger crumbles and 1 tsp. Better Than Bouillion Vegetarian No Beef Base
Brown the veggie burger/onion mixture, stirring occasionally, while you prepare the following:
2-3 stalks of celery, diced
2-3 carrots, peeled and diced
4 medium potatoes, peeled and diced
Add the diced veggies to the pot and cook, stirring for about 10 minutes.
Stir in 1/4 cup dry brown rice, rinsed
Add 1 1/2 cups of your favourite spaghetti sauce, 1 1/2 cups water and the liquid from one can of black beans (reserve beans to be added later) and 1/4 tsp. chili powder.
Bring to a boil. Cover, reduce heat and simmer for 30-35 minutes.
Check potatoes and rice for doneness. Add more liquid, if necessary and continue to cook until potatoes and rice are done.
Stir in black beans and cook just long enough to heat through. Turn off heat, taste and adjust seasonings.
We LOVED this. Shane requested that I add it to our list of "Dinners We Really Like." I will. I thought about adding peas and green beans, and I think that would have been good, too.
I would have photographed it, but we were too busy scarfing it up. Next time, I might add more veggies, and I will definitely make cornbread or biscuits to go with it (Shane is lobbying for cornbread, and i think I'm with him). Oh, BTW, I added a little hot sauce to mine, and I think it was perfect. For the record, I served this with roasted cauliflower and garlic, for which I will post a recipe at a later date. It was also positively delicious.
So that's it. Until next time ~ ARRRRRRRRRRRRRRGH!
Friday, September 23, 2011

Friday, September 16, 2011
Lunch? It's in the bag!
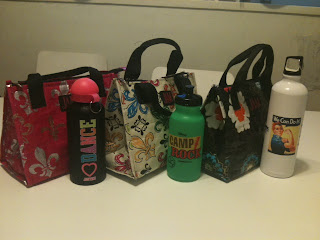
Another school year is off to a roaring start here in Sunny So-Cal, and, for us, that means another year of "What shall we pack for lunch?" Sure, my kids could buy lunch, because I believe most schools in the area stipulate now that they do, in fact, offer vegetarian choices. Unfortunately, their vegetarian choice is cheese pizza ~ that's really the only one I have ever seen offered ~ AND there is no guarantee that there will be any left by the time my children get through the line, and they might be stuck with the other option of the day, which will not be vegetarian. Besides which, my kids aren't big fans of cafeteria food. So, we pack our lunches.
Now, my kids are not big sandwich-eaters, either. Well...hmmm...let me take that back. Two of my kids LOVE sandwiches, assuming they make them at home and eat them immediately. Last night, for instance, was Sandwich Night. I have decided, this year, to have a Sandwich Night for dinner once a week. More about that in another entry. Kid # 3 likes things that other people put on sandwiches, as long as they never touch each other, so she'll eat, say, some peanut butter, a slice or two of bread and a banana, but the idea of a peanut butter banana sandwich totally shocks and appalls her. What it comes down to this: we don't often pack the traditional sandwich in a bag for our kids' school lunches. There are some exceptions, and I'll let you know about them in another entry, also. Suddenly, I have so much food to blog about. Where to begin...? Well, I decided that, today, I will write about today's lunches. That seems elementary enough, does it not, My Dear Watson?
As I mentioned, last night was Sandwich Night. Naturally, we had a lot of leftover sandwich fixins, and three lunchboxes to pack...and three kids who aren't big sandwich-eaters. Convenient, non? We decided to make one of our favourite lunches ~ or should that read SOME of our favourite lunches, since there were actually three of them? ~ our own, homemade version of the ever-popular Lunchables. Now, Lunchables are super convenient, and kids seem to like them. In fact, I even used to be able to find a vegetarian version years ago, and I am sure I could find it again, if I felt like searching for it. The thing is, they don;t always contain EXACTLY what each kid likes. We have special dietary needs to consider, even beyond the vegetarian aspect ~ one daughter has a milk allergy, another is allergic to strawberries, we have one with some serious food aversions, etc. ~ so, for us, it works best to make our own, using ingredients each child likes.
This year, I lucked out and found some super-cute and convenient divided containers that fit perfectly in to the cute new lunch bags. You can also use a variety of small containers and pack things separately, but I have to say, they look extra fun and appetizing packed up together, just like a real Lunchable. If you have a divided container, like ours, you might want to pick up some little paper cups or smaller containers that will fit inside, to separate the ingredients and make it look (and taste) more appetizing. Check out bento boxes online. There are a lot of interesting varieties of containers, and the possibilities of what to pack inside them are endless. Visual appeal really does matter. I have found children, like most people, are far more likely to eat food if it looks good. Not surprising, if you think about it, since children are actually just fun-sized humans, and I know I don't relish eating yucky stuff.
So, once you have your containers, you just need to choose which ingredients to include. In future entries, I will revisit this idea and share other school lunches packed in the same way, so you can get an idea of how fun, interesting and varied these lunches can be. This time, I will just show you what the girls took for lunch today:

First, Justice's "Lunchable"-style lunch, which contains vegetarian "ham," soy cheese, red grapes and 12-grain crackers.
Next, Kaia's, which contains soy turkey, American cheese, 12-grain crackers (she loves those, too) and yogurt-covered raisins.

And, finally, Hallie's. In one side of her neat little box, she has a mixture of diced tomato, garlic, basil, ground black pepper and a tiny bit of red wine vinegar & olive oil. In the other side, she has two slices of fresh mozzarella. We also packed red grapes in a small round container and sliced bread in a waxed paper bag.

The girls also have snack breaks during the day, so, today their bags included a Z-bar for Justice and one for Kaia, and a fruit gel for Hallie ~ and, of course, the all-important canteen full of water.
So, that's today's lunch. Stay tuned for more exciting, foody, vegetarian news from the place we like to call "Little House in the Big Yard."
Sunday, September 11, 2011
(Vegetarian) Hamburger Pie
Hamburger Pie.
It's a recipe my mom used to make when I was growing up. It was always one of my favourites, and my dad's, too. I remember Mom once telling me that she'd never met a man who didn't love it. So, once, many years ago, I decided to make it for Shane (substituting veggie burger crumbles for the usual ground beef, of course). As far as I can tell, my mother was right (as usual...funny how we never figure that out until we're grown, isn't it?). Shane loved it. Luckily, so do the kids (well, two of them. The little one eats the potatoes, veggie burger, green beans and corn all separately, so it works out okay ~ I just leave a little bit of each ingredient aside for her). For me, it is the ultimate comfort food. There's the burger, the potatoes, green beans, corn, tomato soup...mmm-mmmm! It's quick and easy to make, doesn't dirty a lot of pans, makes everyone happy...What's not to love?
So, here ya go. This is a simple one.
Start by making some mashed potatoes. That is, unless you already have mashed potatoes left over, in which case, you'd might as well use those. You can make homemade mashed potatoes or instant, whichever you prefer. Make them the way you usually do, because that's the way you like them, right? My family won't eat instant potatoes. I tried once. They all looked at me like I was crazy. Funny. I remember loving instant mashed potatoes as a kid.
Next, in a large cast iron skillet (or stovetop to oven casserole...or a skillet, then later transfer to a baking dish...but we have always used the cast iron skillet, just like Mom does), heat a little olive oil. Get the skillet good and hot over medium-low heat first, then put in your oil ~ just enough to coat the bottom of the pan a little. Let it heat for a few moments. Add one package of veggie burger crumbles, your choice. Sprinkle in a few dashes of ground black pepper and a little onion powder. Brown the burger, then add one can of cut green beans, drained, and one can of corn, drained. Stir in one can condensed tomato soup, and cook until it is hot through.
Turn off heat. Spread mashed potatoes evenly over the top, then pop in the oven at about 400℉ until hot and bubbly around the edges and slightly golden on top. Remove from oven and let stand for about 10 minutes before serving.
That's it. Perfect.
Note: If desired, you can sprinkle a little grated parmesan over the top before you bake it, but we don't do that, since we have dairy allergies here.
Also, I have to admit, tonight, I did not have canned corn, so I just threw in some frozen mixed vegetables. It was STILL perfect. I'm pretty sure this stuff is almost impossible to wreck.
Enjoy!
EDIT: Mom said this recipe originally came to her from her sister, my aunt, Eleanor (Gambino) Larsen. Thanx for the info., Mom ~ and big thanx to Aunt Eleanor for the recipe. We sure do love it.
It's a recipe my mom used to make when I was growing up. It was always one of my favourites, and my dad's, too. I remember Mom once telling me that she'd never met a man who didn't love it. So, once, many years ago, I decided to make it for Shane (substituting veggie burger crumbles for the usual ground beef, of course). As far as I can tell, my mother was right (as usual...funny how we never figure that out until we're grown, isn't it?). Shane loved it. Luckily, so do the kids (well, two of them. The little one eats the potatoes, veggie burger, green beans and corn all separately, so it works out okay ~ I just leave a little bit of each ingredient aside for her). For me, it is the ultimate comfort food. There's the burger, the potatoes, green beans, corn, tomato soup...mmm-mmmm! It's quick and easy to make, doesn't dirty a lot of pans, makes everyone happy...What's not to love?
So, here ya go. This is a simple one.
Start by making some mashed potatoes. That is, unless you already have mashed potatoes left over, in which case, you'd might as well use those. You can make homemade mashed potatoes or instant, whichever you prefer. Make them the way you usually do, because that's the way you like them, right? My family won't eat instant potatoes. I tried once. They all looked at me like I was crazy. Funny. I remember loving instant mashed potatoes as a kid.
Next, in a large cast iron skillet (or stovetop to oven casserole...or a skillet, then later transfer to a baking dish...but we have always used the cast iron skillet, just like Mom does), heat a little olive oil. Get the skillet good and hot over medium-low heat first, then put in your oil ~ just enough to coat the bottom of the pan a little. Let it heat for a few moments. Add one package of veggie burger crumbles, your choice. Sprinkle in a few dashes of ground black pepper and a little onion powder. Brown the burger, then add one can of cut green beans, drained, and one can of corn, drained. Stir in one can condensed tomato soup, and cook until it is hot through.
Turn off heat. Spread mashed potatoes evenly over the top, then pop in the oven at about 400℉ until hot and bubbly around the edges and slightly golden on top. Remove from oven and let stand for about 10 minutes before serving.
That's it. Perfect.
Note: If desired, you can sprinkle a little grated parmesan over the top before you bake it, but we don't do that, since we have dairy allergies here.
Also, I have to admit, tonight, I did not have canned corn, so I just threw in some frozen mixed vegetables. It was STILL perfect. I'm pretty sure this stuff is almost impossible to wreck.
Enjoy!
EDIT: Mom said this recipe originally came to her from her sister, my aunt, Eleanor (Gambino) Larsen. Thanx for the info., Mom ~ and big thanx to Aunt Eleanor for the recipe. We sure do love it.
Friday, July 29, 2011
I've Got a Lovely Bunch of Coconut Cupcakes
Well, now I have three. I HAD a lovely bunch of coconut cupcakes last night, before a bunch of people ate them. Now, I have three. And they are lovely. You'll have to trust me this time, because I didn't bother to snap a picture, but they turned out very cute, indeed.
I have to say, these cupcakes did not come off without a hitch. You see, since watching a late-night cooking show early last week, I have been craving coconut cupcakes. It just never seemed to be the right time to make them, until yesterday.
The night before last, I couldn't sleep ~ not a wink! So, around 5:00 a.m., I gave up, got out of bed and tiptoed out to the kitchen to (finally!) make coconut cupcakes. I decided to adapt the great vegan vanilla cupcake recipe I had discovered online a couple of months ago. How hard could it be?
Hard. I used coconut milk beverage, which I had used when making the vanilla cupcakes, and added coconut flavouring instead of the 1/4 tsp. almond or vanilla extract (in addition to the usual vanilla extract) recommended in the original recipe. I don't think either of those things was the problem. I also opted to use margarine instead of oil (which I had always used before in the recipe). Now, this was presented in the original recipe as an option, so that might not have been the problem, either. Honestly, I think the problem was loud, rumbly, low-flying aircraft. There seemed to be an abundance of loud, rumbly, low-flying aircraft at that particular time. At any rate, my sad little cupcakes fell. I let them cool, thinking maybe they weren't as bad as they looked. Upon tasting, we determined they were, indeed that bad.
At first, I wasn't really feeling like washing up all of the dishes and starting over, but, as the day wore on, I decided I really wanted those coconut cupcakes. After all, I had been craving them for more than a week. So, I went online and found what sounded like a good recipe. I figured, if it flopped again, I'd give up...for the day, anyway.
Now, I think the only thing I did differently than the original recipe was to add coconut flavour (Frontier Natural Products Co-op Coconut Flavor, to be precise). Here's what I did, along with a link to the original recipe:
Vegan Coconut Cupcakes
Ingredients (use vegan versions):
1 1/2 cups flour
1 cup white sugar
1/2 cup shredded coconut
1 teaspoon baking soda
1/2 teaspoon salt
1 cup coconut milk (actual coconut milk, not coconut milk beverage)
1/3 cup canola oil
1 teaspoon vanilla extract
1 teaspoon coconut flavouring
1 teaspoon apple cider vinegar
Directions:
1. Preheat oven to 350 degrees F. Fill cupcake pan with liners. In a large bowl, mix together the flour, sugar, coconut, baking soda, and salt. Add in the rest of the ingredients, adding the vinegar last. Stir until well combined.
2. Pour into cupcake liners and bake 30 minutes or until centers come out clean. Remove from oven and allow to cool.
3. Frost with your favorite vegan buttercream frosting. Decorate with freshly toasted coconut.
Here's the link: http://vegweb.com/index.php?topic=22157.0
I made a vegan coconut buttercream frosting, like this:
1/2 cup Spectrum Organic Butter Flavor Shortening
3 TBS coconut milk (regular, not "light")
1 1/2 tsp. vanilla extract
1 tsp. coconut flavouring
2 dashes salt
2 1/2 cups confectioner's sugar
1/4 cup shredded coconut
In a medium bowl, using an electric mixer, cream shortening, coconut milk, vanilla, coconut flavouring, and salt until smooth and well-combined. Add sugar, a little at a time, mixing well after each addition, until desired consistency is reached. Gently stir in coconut or, if preferred, sprinkle shredded coconut on top of cupcakes after they are frosted, instead of mixing it in.
I mixed in the coconut and put colorful sprinkles on top, but I thought they would be nice topped with finely shredded dark chocolate, or even finely chopped dried pineapple, too.
Notes:
In both recipes, I used unsweetened shredded coconut, which is hard to find. I got mine at Whole Foods Market. If you can only find sweetened coconut, go ahead and use it. If you are concerned about your cupcakes being too sweet, you can reduce the sugar a bit, but I don't think it will be a problem, as one of the things we really enjoyed about these cakes was that they were not overly sweet.
I am sure you could substitute your favourite vegan margarine or even plain shortening for the butter flavor shortening, but I really like the flavour it gives the frosting. Just play around with it until you find what works for you.
These cupcakes are even better the next day. They just seem moister and more coconut-y. I highly recommend making them a day before you plan to eat them, and storing in an airtight container overnight. Enjoy!
I have to say, these cupcakes did not come off without a hitch. You see, since watching a late-night cooking show early last week, I have been craving coconut cupcakes. It just never seemed to be the right time to make them, until yesterday.
The night before last, I couldn't sleep ~ not a wink! So, around 5:00 a.m., I gave up, got out of bed and tiptoed out to the kitchen to (finally!) make coconut cupcakes. I decided to adapt the great vegan vanilla cupcake recipe I had discovered online a couple of months ago. How hard could it be?
Hard. I used coconut milk beverage, which I had used when making the vanilla cupcakes, and added coconut flavouring instead of the 1/4 tsp. almond or vanilla extract (in addition to the usual vanilla extract) recommended in the original recipe. I don't think either of those things was the problem. I also opted to use margarine instead of oil (which I had always used before in the recipe). Now, this was presented in the original recipe as an option, so that might not have been the problem, either. Honestly, I think the problem was loud, rumbly, low-flying aircraft. There seemed to be an abundance of loud, rumbly, low-flying aircraft at that particular time. At any rate, my sad little cupcakes fell. I let them cool, thinking maybe they weren't as bad as they looked. Upon tasting, we determined they were, indeed that bad.
At first, I wasn't really feeling like washing up all of the dishes and starting over, but, as the day wore on, I decided I really wanted those coconut cupcakes. After all, I had been craving them for more than a week. So, I went online and found what sounded like a good recipe. I figured, if it flopped again, I'd give up...for the day, anyway.
Now, I think the only thing I did differently than the original recipe was to add coconut flavour (Frontier Natural Products Co-op Coconut Flavor, to be precise). Here's what I did, along with a link to the original recipe:
Vegan Coconut Cupcakes
Ingredients (use vegan versions):
1 1/2 cups flour
1 cup white sugar
1/2 cup shredded coconut
1 teaspoon baking soda
1/2 teaspoon salt
1 cup coconut milk (actual coconut milk, not coconut milk beverage)
1/3 cup canola oil
1 teaspoon vanilla extract
1 teaspoon coconut flavouring
1 teaspoon apple cider vinegar
Directions:
1. Preheat oven to 350 degrees F. Fill cupcake pan with liners. In a large bowl, mix together the flour, sugar, coconut, baking soda, and salt. Add in the rest of the ingredients, adding the vinegar last. Stir until well combined.
2. Pour into cupcake liners and bake 30 minutes or until centers come out clean. Remove from oven and allow to cool.
3. Frost with your favorite vegan buttercream frosting. Decorate with freshly toasted coconut.
Here's the link: http://vegweb.com/index.php?topic=22157.0
I made a vegan coconut buttercream frosting, like this:
1/2 cup Spectrum Organic Butter Flavor Shortening
3 TBS coconut milk (regular, not "light")
1 1/2 tsp. vanilla extract
1 tsp. coconut flavouring
2 dashes salt
2 1/2 cups confectioner's sugar
1/4 cup shredded coconut
In a medium bowl, using an electric mixer, cream shortening, coconut milk, vanilla, coconut flavouring, and salt until smooth and well-combined. Add sugar, a little at a time, mixing well after each addition, until desired consistency is reached. Gently stir in coconut or, if preferred, sprinkle shredded coconut on top of cupcakes after they are frosted, instead of mixing it in.
I mixed in the coconut and put colorful sprinkles on top, but I thought they would be nice topped with finely shredded dark chocolate, or even finely chopped dried pineapple, too.
Notes:
In both recipes, I used unsweetened shredded coconut, which is hard to find. I got mine at Whole Foods Market. If you can only find sweetened coconut, go ahead and use it. If you are concerned about your cupcakes being too sweet, you can reduce the sugar a bit, but I don't think it will be a problem, as one of the things we really enjoyed about these cakes was that they were not overly sweet.
I am sure you could substitute your favourite vegan margarine or even plain shortening for the butter flavor shortening, but I really like the flavour it gives the frosting. Just play around with it until you find what works for you.
These cupcakes are even better the next day. They just seem moister and more coconut-y. I highly recommend making them a day before you plan to eat them, and storing in an airtight container overnight. Enjoy!
Thursday, January 13, 2011
Simple Soup for a Busy Day
Long time, no post.
Sorry. With one kid in 5th grade (looking for a good Middle School), one in 8th (looking at High Schools) and one in 2nd (just being a 2nd-grader, but, really, that's enough), two of whom are musicians and the third a ballerina...well, the joint is jumping here in Sunny So-Cal. (Yeah, it is sunny, even in the Winter.)
Top that all off we a recent trip to Montana for the holidays, then a bout with some miserable intestinal malady, and follow it all up with a sinus infection for daughter #1, and you'll have a rough idea of how our last couple of months have been.
So, a couple of nights ago, I happened to look up and think to myself (as I often do), "Oh, that's right ~ dinner! I have to cook that."
It was late, I was tired. Nobody felt like eating anything heavy. But I did have a package of Trader Joe's Thai Vegetable Gyoza (pot stickers) in the freezer.
Here's what I did:
Bring to boil:
2 qts. water
1 TBS (or more, to taste) vegetarian boullion of your choice
3 nice, thick slices from a large onion
1 rib of celery, sliced
Season to taste with soy sauce, a dash or two of seasoned rice wine vinegar and a pinch of Chinese Five Spice seasoning.
Add 2-3 cups frozen mixed vegetables (I used an organic frozen vegetable mix that I had on hand)
Bring back up to a boil. Reduce to simmer and cook for about 10 minutes. Add the frozen pot stickers and simmer just until they are hot through.
Tada!
Soup.
I found it was fairly important to eat this right away, before the pot stickers could get mushy. Otherwise, I highly recommend fishing out the pot stickers and setting them on a plate, instead of leaving them in the broth. I suppose you could cook them separately, and then just spoon the soup over them in your bowl, but my method was quick and easy, and dirtied only one pan.
We'd had a fairly protein-heavy day, so I didn't think it was necessary to add anything else this time. However, I think some cubed tofu or a handful or two of edamame would be nice. Also, I am sure the addition of other, more interesting vegetables (and fresh, rather than frozen, too) would be make it even better, but I was going for quick and simple.
My apologies for the lack of pictures this time. If you want, one of you can make it and take a picture. Then you can show us all how lovely it was :)
Sorry. With one kid in 5th grade (looking for a good Middle School), one in 8th (looking at High Schools) and one in 2nd (just being a 2nd-grader, but, really, that's enough), two of whom are musicians and the third a ballerina...well, the joint is jumping here in Sunny So-Cal. (Yeah, it is sunny, even in the Winter.)
Top that all off we a recent trip to Montana for the holidays, then a bout with some miserable intestinal malady, and follow it all up with a sinus infection for daughter #1, and you'll have a rough idea of how our last couple of months have been.
So, a couple of nights ago, I happened to look up and think to myself (as I often do), "Oh, that's right ~ dinner! I have to cook that."
It was late, I was tired. Nobody felt like eating anything heavy. But I did have a package of Trader Joe's Thai Vegetable Gyoza (pot stickers) in the freezer.
Here's what I did:
Bring to boil:
2 qts. water
1 TBS (or more, to taste) vegetarian boullion of your choice
3 nice, thick slices from a large onion
1 rib of celery, sliced
Season to taste with soy sauce, a dash or two of seasoned rice wine vinegar and a pinch of Chinese Five Spice seasoning.
Add 2-3 cups frozen mixed vegetables (I used an organic frozen vegetable mix that I had on hand)
Bring back up to a boil. Reduce to simmer and cook for about 10 minutes. Add the frozen pot stickers and simmer just until they are hot through.
Tada!
Soup.
I found it was fairly important to eat this right away, before the pot stickers could get mushy. Otherwise, I highly recommend fishing out the pot stickers and setting them on a plate, instead of leaving them in the broth. I suppose you could cook them separately, and then just spoon the soup over them in your bowl, but my method was quick and easy, and dirtied only one pan.
We'd had a fairly protein-heavy day, so I didn't think it was necessary to add anything else this time. However, I think some cubed tofu or a handful or two of edamame would be nice. Also, I am sure the addition of other, more interesting vegetables (and fresh, rather than frozen, too) would be make it even better, but I was going for quick and simple.
My apologies for the lack of pictures this time. If you want, one of you can make it and take a picture. Then you can show us all how lovely it was :)
Saturday, October 2, 2010
Gazpacho (for Shane)
When Shane and I first got got together, before there were children with sensitive little tastebuds, ballet recitals, orchestra performances and drumsticks, we moved to the Tempe, Arizona area together so that I could finish my Theatre Education degree at ASU. There, we met some of our best friends, and we discovered a great little place called Pita Jungle, where we used to share an order of hummus w/ pita and cold, refreshing bowls of gazpacho on a hot afternoon.
We loved gazpacho. In fact, somebody gave us a tote bag with a recipe for gazpacho printed on it, but, before I ever got to try it, the bag disappeared. Then there was school, and work, and soon enough, children, a move to California...and somehow, I just never got around to trying my hand at making gazpacho. I don't know why. I always knew it would be easy enough, and I always knew how much we liked it, but I just never did. That is, until yesterday.
While I was (and continue) to recover from bronchitis (and terrible side effects from the medication I was given), I had a lot of time on my hands. I decided to spend some of it researching gazpacho recipes in an effort to find one that sounded like it might approximate our beloved Pita Jungle gazpacho. I discovered that, traditionally, gazpacho contains bread, but the one we liked so much didn't seem to, so I decided to skip that. I found a lot of variations, but, in the end, decided to base mine on a recipe in the Joy of Cooking. I did make some modifications (and you might make more) but the resulting gazpacho was so well-received by my husband, that I promised to share the recipe with friends, so here it is (mine, that is, not the Joy of Cooking's...'though it is close):
GAZPACHO
In a food processor, finely chop:
1 medium cucumber, peeled, seeded, coarsely chopped
1 medium green pepper, coarsely chopped
Remove to a large bowl (or pitcher).
Finely chop in the processor:
1 small red onion
1/3 - 1/2 cup packed fresh cilantro (leaves only; no stems)
Remove to the same bowl or pitcher.
In the processor, finely chop:
2 1/2 lbs ripe tomatoes, peeled*, seeded and coarsely chopped
Remove to the bowl/pitcher.
Now, to the chopped veggies in your bowl/pitcher, add the following:
1-2 cups tomato juice (start with 1c, mix, decide if you need more)
1/4 cup red wine vinegar
3 TBS extra virgin olive oil
2-3 garlic cloves, minced
2 tsps. salt
If desired, add 1 fresh jalapeno, seeded and minced, or a few dashes of hot sauce. I chose to skip this and serve with hot sauce on the side, since I wasn't sure how spicy the kids would like it. Remember, too, if you will be storing it in the fridge for a day or two, the hot pepper will get hotter over time as it sits, so you might be better off leaving that on the side.
Taste and adjust seasonings. Chill for at least 2 hours before serving.
This makes a very thick soup. If you like it thinner, you can add ice cold water to thin it. Make sure the water you add is cold, so your veggies stay nice and crisp.
*The easiest way to peel a tomato is as follows:
Bring to a boil a large pot of water. Have ready nearby a large bowl of cold water. Cut a tiny "x" in the bottom of each tomato. Plunge tomatoes into hot water for just a minute or so, then fish them out with tongs and drop them into the cold water for another minute or so. When you pull them out of the cold water, you should be able to pull off the skins with very little effort. Cut peeled tomatoes in half, scoop out the seeds, and you're ready to roll.
Hope you all enjoy this as much as we do. We are keeping it in a pitcher in the fridge and eating at it whenever we feel a little peckish. Shane has requested that I keep some around "all the time." I am not sure how realistic a goal that is, but I will try to make it often :)
(Thanx, honey!)
We loved gazpacho. In fact, somebody gave us a tote bag with a recipe for gazpacho printed on it, but, before I ever got to try it, the bag disappeared. Then there was school, and work, and soon enough, children, a move to California...and somehow, I just never got around to trying my hand at making gazpacho. I don't know why. I always knew it would be easy enough, and I always knew how much we liked it, but I just never did. That is, until yesterday.
While I was (and continue) to recover from bronchitis (and terrible side effects from the medication I was given), I had a lot of time on my hands. I decided to spend some of it researching gazpacho recipes in an effort to find one that sounded like it might approximate our beloved Pita Jungle gazpacho. I discovered that, traditionally, gazpacho contains bread, but the one we liked so much didn't seem to, so I decided to skip that. I found a lot of variations, but, in the end, decided to base mine on a recipe in the Joy of Cooking. I did make some modifications (and you might make more) but the resulting gazpacho was so well-received by my husband, that I promised to share the recipe with friends, so here it is (mine, that is, not the Joy of Cooking's...'though it is close):
GAZPACHO
In a food processor, finely chop:
1 medium cucumber, peeled, seeded, coarsely chopped
1 medium green pepper, coarsely chopped
Remove to a large bowl (or pitcher).
Finely chop in the processor:
1 small red onion
1/3 - 1/2 cup packed fresh cilantro (leaves only; no stems)
Remove to the same bowl or pitcher.
In the processor, finely chop:
2 1/2 lbs ripe tomatoes, peeled*, seeded and coarsely chopped
Remove to the bowl/pitcher.
Now, to the chopped veggies in your bowl/pitcher, add the following:
1-2 cups tomato juice (start with 1c, mix, decide if you need more)
1/4 cup red wine vinegar
3 TBS extra virgin olive oil
2-3 garlic cloves, minced
2 tsps. salt
If desired, add 1 fresh jalapeno, seeded and minced, or a few dashes of hot sauce. I chose to skip this and serve with hot sauce on the side, since I wasn't sure how spicy the kids would like it. Remember, too, if you will be storing it in the fridge for a day or two, the hot pepper will get hotter over time as it sits, so you might be better off leaving that on the side.
Taste and adjust seasonings. Chill for at least 2 hours before serving.
This makes a very thick soup. If you like it thinner, you can add ice cold water to thin it. Make sure the water you add is cold, so your veggies stay nice and crisp.
*The easiest way to peel a tomato is as follows:
Bring to a boil a large pot of water. Have ready nearby a large bowl of cold water. Cut a tiny "x" in the bottom of each tomato. Plunge tomatoes into hot water for just a minute or so, then fish them out with tongs and drop them into the cold water for another minute or so. When you pull them out of the cold water, you should be able to pull off the skins with very little effort. Cut peeled tomatoes in half, scoop out the seeds, and you're ready to roll.
Hope you all enjoy this as much as we do. We are keeping it in a pitcher in the fridge and eating at it whenever we feel a little peckish. Shane has requested that I keep some around "all the time." I am not sure how realistic a goal that is, but I will try to make it often :)
(Thanx, honey!)
Wednesday, September 22, 2010
The Banana Muffin, Perfected

It's difficult to type while patting oneself on the back, but I'll try. You see, for some time, I have been trying to arrive at the perfect banana muffin. Something that tastes good, has a pleasant texture (moist, but not mushy; tender, but not crumbly...) and is not too terrible from nutritional standpoint. After making many adjustments to many recipes, by Jove! I think I've got it! Now, you can have it, too :)
Perfect Banana Muffins
1 cup almond meal
1.5 cups whole wheat flour
1 cup all purpose flour
1 tsp ground cinnamon
2 tsp. baking soda
1 tsp. salt
2 TBS graham cracker crumbs
2/3 cup oil
1 cup honey
4 eggs
1 tsp. vanilla extract
2 cups mashed bananas
½ cup hot milk or milk substitute**
Heat oven to 325 F.
In a large bowl, combine all dry ingredients. In a separate bowl, combine oil, honey* vanilla and eggs. Stir mashed bananas into wet ingredients and mix well. Add wet ingredients to dry ingredients, alternating with hot milk.
Pour batter into greased muffin tin and bake for about 20-25 minutes, or until done.
Optional: serve topped with a dollop of peanut butter and a drizzle of honey (do this upon serving, or provide toppings on the side ~ do not top them all and plan to store them this way).
* Tip: Measure oil first, then use the same measuring cup to measure your honey, and it will slide out cleanly, without sticking.
** I used So Delicious Coconut Milk Beverage, but you can use your favourite milk substitute…or regular milk….or probably even just plain water.
And here's the rest of the good news: I found a site that will let me input a recipe and figure the nutrition facts. Check it out.
Nutrition Facts
Serving Size 85 g
Calories 258
Calories from Fat 109
Total Fat 12.1g
Saturated Fat 1.7g
Trans Fat 0.0g
Cholesterol 42mg
Sodium 290mg 12%
Total Carbohydrates 34.7g
Dietary Fiber 1.7g
Sugars 18.3g
Protein 4.7g
Vitamin A 1% • Vitamin C 3%
Calcium 3% • Iron 7%
Nutrition Grade C-
* Based on a 2000 calorie diet
I am no nutritionist, but I think this one stacks up pretty well. What do you think? Are these good numbers for a muffin? I mean, I am not thrilled with the C- grade, but, when I compared it to the nutrition facts on another site for a generic banana nut muffin, I found that mine had fewer calories, less sugar, less sodium, less fat, less saturated fat, more protein, more fiber and more iron, so, for a snack food that you don't plan to eat every single day, it's probably okay, right? I mean, it may not be the healthiest food in the whole world, but, for what it is, I think it's acceptable.
Obviously, if you serve it with the optional peanut butter/honey topping, you change the nutrition information, but it is so, so yummy that way. And, if you eat it for, say, breakfast, it's probably still a pretty decent choice. I checked the nutrition facts for that (assuming 1 TBS peanut butter and 1/2 tsp honey per muffin), and it wasn't bad, IMO. Calories and fat rose, as expected (363 cal. and about 20 grams of fat, which is, admittedly, a lot), but so did the protein, fiber and iron, so, you know, make informed choices. You could probably lower the fat in the actual muffin by subbing applesauce for some of the oil, but you have to go in knowing that the resulting muffin won't be quite as moist as the original, and you'll bring up the sugar count a bit, I suspect.
Ultimately, I feel this recipe works for us because it is sweet, but not too sweet, and because Kaia won't eat baked goods with nuts in them...but...nuts are so good for you! The addition of almond meal to this recipe packs in little extra nutritional umph, but it blends right in with the texture of the wheat flour, so she'll actually eat it. Hallie is not a huge fan of whole wheat baked goods (weird, because she loves whole wheat pastas), so using part whole wheat and part all purpose flour makes it a little less...um..."Whole-Wheaty," I guess.
Subscribe to:
Posts (Atom)